Showing posts with label Play. Show all posts

Monday, 1 February 2016


Fizzy Ice

Exploring science is an exciting and wondrous part of early childhood. To carry out their scientific “wonderings,” children need time to explore and discover scientific concepts in risk-free, playlike settings. It is through these repeated experiences involving interaction with people and materials—the physical and social environments—that children construct their own knowledge (Piaget, 1952; DeVries & Kohlberg, 1990). When children are interacting with materials, observing, questioning, thinking, making predictions, and experimenting to confirm their ideas in a meaningful setting, they are making maximum use of the brain’s capacity for learning (Bredekamp & Rosegrant, 1993).

The following activity during one of our Young Explorer Sessions provided the perfect opportunity for our young visitors to explore and investigate properties of ice.  The language captured by our facilitator provides a glimpse into the rich learning that was taking place that morning.

For one of our Young Explorers programs this January we chose to explore ice….Fizzy Ice at that!
Here are the supplies we needed:
• 2 Large bags of ice in a big container
• Vinegar.
• Water Colour.
• Pipettes
• Baking Soda.

After the supplies were gathered, we were ready to begin!
We began by shaking baking soda over the large pieces of ice. This made the ice look like an arctic world.
Whoa…that smells yukky [vinegar].”

Look, Chelsey….Its fizzing!”
The children began to drop different colours on the ice and were amazed by the reaction that was made when the vinegar reacted with the baking soda. They were also amazed by the mixing of colours and how the liquid dripped in-between each ice cube. As the ice began to melt it encouraged a lot of conversation about lakes, waterfalls and rivers.
I can hear the bubbles…they make a fizzy pop!”
- “Look, it’s dripping, it’s like a water fall!”

See, the colours mixing Mom, it is purple!! Its melting….it looks like a big lake!”     “It’s a big rainbow on the ice!”

Submitted by Lynda Gellner B.ED, M.ED
Pictures and Documentation provided by Chelsey Hobman


Sunday, 30 August 2015

August Sensory Make and Take

The August Sensory Make and Take was a four week pre-registered program that provided parents insight on how easy making child activities can be with things you most likely have around home. No need buy expensive toys!

Week One - Jello Hunt 

Follow directions on back of Jello box. Use little bowls/containers, put a candy or toy at the bottom and fill with Jello until covered.  I used gummy worms.   Put in the fridge and let it set. Then have fun finding the hidden treasures. 


Week Two - Flubber 

In a big bowl:
2 cups - Elmers glue
2 cups - water
Couple drops of food colouring or water colour

In a smaller bowl:
1/2 cup - Borax
2 cups - boiling water
Stir slowly, letting all the Borax dissolve. This is a good way to practice patience.

Once Borax is dissolved pour into the big bowl.
Slowly stir and the mixture will start to clump together.
You may need to use your hands to finish mixing the water with the glue. Be careful as the water can still be hot.
Once most of the water is mixed with the glue it is done.


Week Three - Sidewalk Chalk Paint 

1/2 cup - cornstarch
1/2 cup - water
1 Tbsp - tempera paint

Optional - a squirt of dish soap for a greater washability

Stir well and have fun creating! 


Week Four - Edible Finger Paint

There are several ways to make non-toxic edible finger paint. We chose to use shaving cream and water colour. 

Squirt the desired amount of shaving cream into a bowl.  We used glass jars with lids so it was easier to take home.  However, I would not recommend this as it was much harder to mix. Squirt a couple drops of food colouring/water colour on the shaving cream.  We used water colour as it doesn't stain. 
Mix well. 

This paint can be used on paper. Also is great in the bathtub making clean up easy! 


Sad you missed this program? No need to worry – another Make and Take program using household items such as popsicle sticks, paper plates, paper bags, etc. will be back in September with some new and different ideas. Call Laura at Scott (306) 523-3512 to register.

Laura Bieber


Tuesday, 14 July 2015

Busy Buzzing Bees


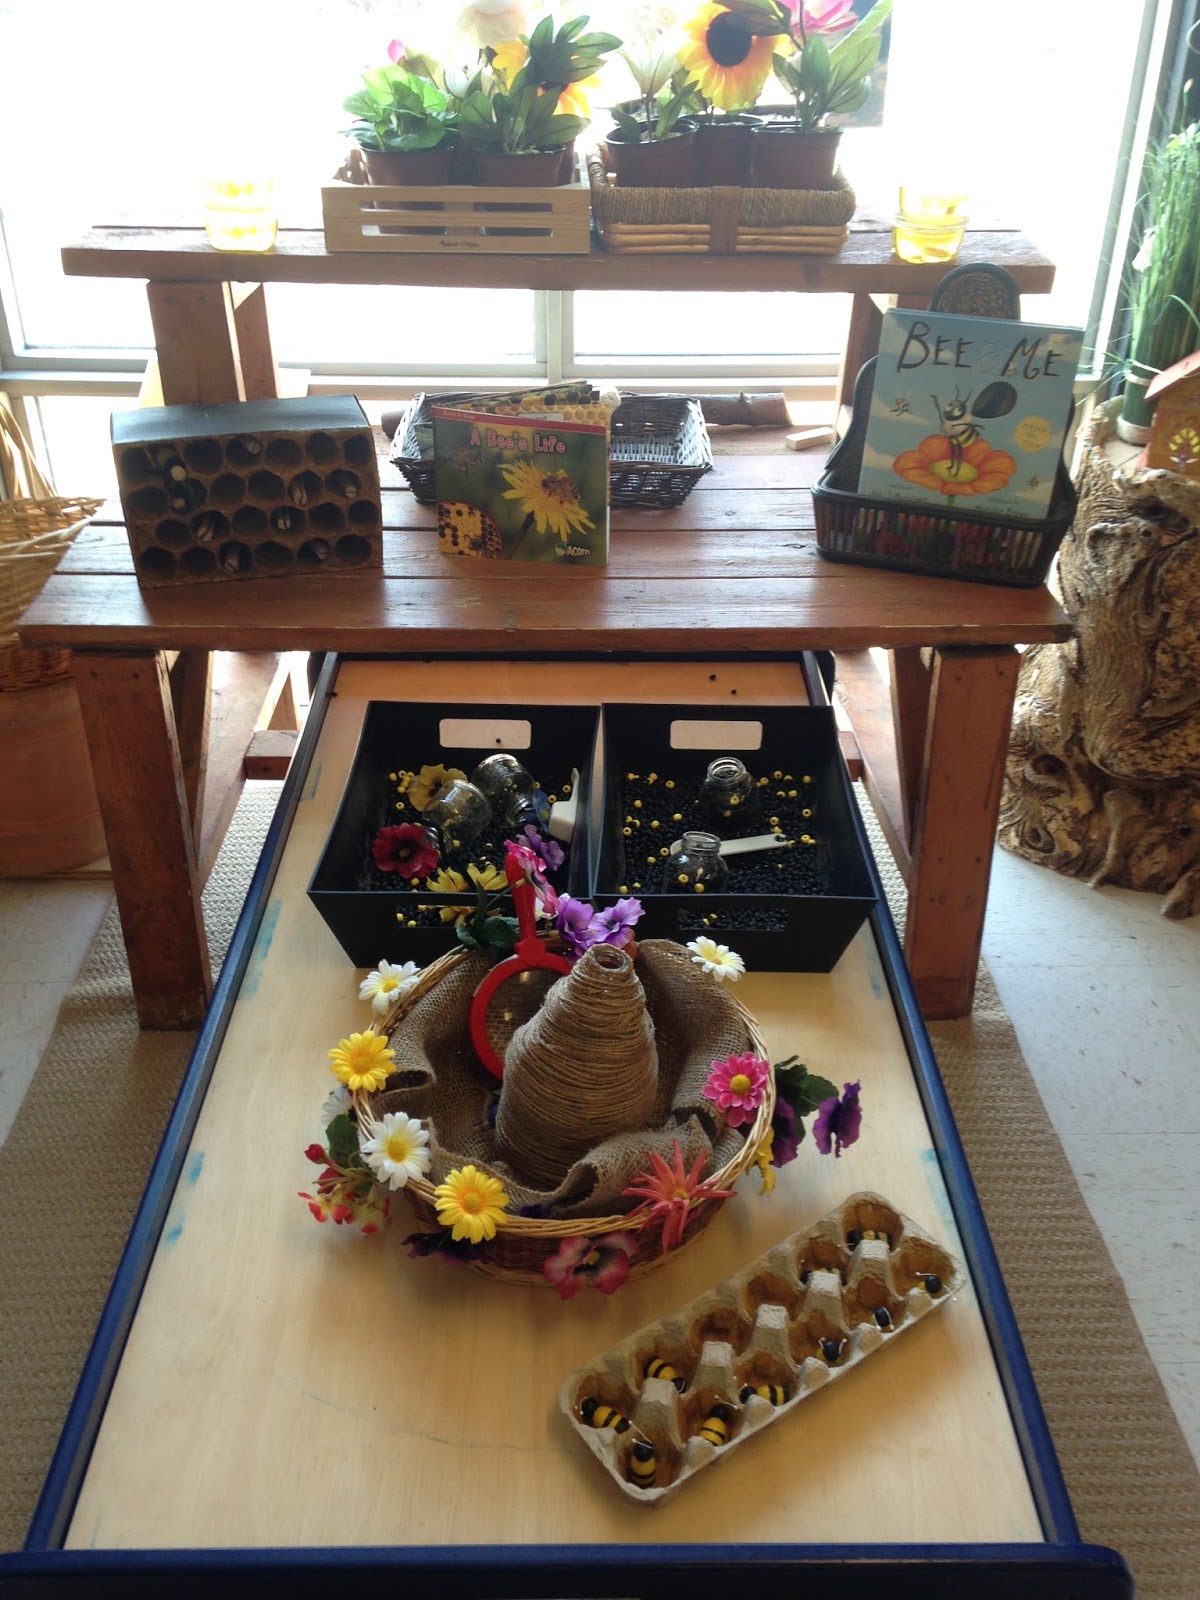
During July at Dr. Hanna, children were busy buzzing around the centre!


A beekeeping family that visits the centre offered a dormant beehive for observation and inspiration. 


The children used their senses as they explored the wax, the honeycomb shapes and pretended to be beekeepers with hats and gloves


The children smelled, touched and picked at the block of beeswax. They painted bubble wrap available and stamped paper to resemble the honeycomb shape that bees are associated with. Mixing colours allowed for the  children to match  the colour of the beeswax.


Myriam constructed a beehive for one-one correspondence and to develop fine motor skills. She used toilet paper rolls, place them in a box, melted wax and made bees out of clothespins and fuzzy pipe cleaners.


Clear containers of "honey" (shampoo)!


Sensory play was extended into black buckets filled with black beans for pouring and cornmeal to simulate pollination process. The smell of the lavender scented flowers encouraged the relaxation during play.


As we enter into the fall season, watch for our honey available at the Farmer's Market at the Dr. Hanna location. Come play, explore and support our local market. 

Jada, Laura and Myriam

Monday, 29 June 2015

Best Play Dough Recipe Ever!


Play is the work of a child and a nice batch of play dough is a staple in the early learning environment! Play dough lends itself to enhance the children's imagination, fine motor skills, scientific experimentation, social/emotional skills and many language opportunities. The following recipe is a no-cook recipe that contains many items already in your fridge.

While working with play dough, encourage your child to push, poke, shape, flatten and roll. Describe to your child what they are doing while they play to develop vocabulary and comprehension. The recipe below can be adapted to involve more senses by adding colour and scent (maybe even sparkles), experiment with your child to test your hypothesis. At times children will play individually with play dough but often we find in the centres that the children will interact with each other when they play dough is placed in the kitchen. They develop sharing skills, test language abilities and demonstrate their creativity as they cook up meals and baking with the play dough and pots and simply play dough supports brain development throughout the early years.

Some ideas to scent and colour the play dough recipe can be as simple as using food colouring and essential oils or adding a bit of Kool-Aid. Other ideas for a more natural colour and scent may include the juice of blueberries for the colour purple and turmeric powder for a orange/yellow. Get creative and have fun, let your imagination and your child guide you!


Play Dough Recipe

Mix

  • 2 cups of flour
  • 1/2 cup of salt
  • 2 Tbsp cream of tartar
Mix
  • 1 1/2 cups of warm water
  • 2 Tbsp of vegetable oil
  • 1/4 tsp of glycerine
Add wet ingredients to the dry ingredients. Feel free to add more flour until the dough is not sticky. Children love to help add ingredients, pour, stir and mix. They feel very proud when they are able to help with these jobs and take ownership in the accomplishment!

Jada Fiissel

Jada has a Bachelor of Education, has completed her Yoga Teacher Training (300-hours) and a specialization in children’s yoga. She continues to deepen her own understanding through a dedicated practice and teaches adult and Kid’s Yoga throughout the city and incorporates yoga and the teachings in her daily family life.


Monday, 8 June 2015

Importance of Play


Young children, regardless of their age, learn best through play and exploration. Providing a variety of opportunities for them to explore starting at birth is crucial.

For example: This is a ten-month-old exploring paint. There was very little guidance from mom. The child was able to open up her senses and explore the paint with her entire body. She used her fingers, toes, tummy, knees, nose, mouth, etc. By the end of the activity she was covered in paint from head to toe and may have even tried tasting a little. She quickly realized it did not taste very good!


As a parent this type of activity may seem a bit overwhelming at first. However, starting with a small activity will make the bigger and messier exploration activities seem painless and easy.

Click here for more information on the importance of play.


Laura Bieber